In this series of articles, Amy Todd, owner and operator of Zymology Labs, a third-party beer testing lab, who also works part-time in the lab at Zero Gravity Craft Brewery, gives us a detailed ground-floor view of the day-to-day lab routines that separate quality craft breweries from the pack.
A day in the lab series recap:
- Part 1: Sampling
- Part 2: Understanding HLP Tubes
- Part 3: Sensory panel setup, tasting tips and the triangle test
- Part 4: Updating your standard operating procedures
Different amounts and varieties of water, hops, malt and yeast, and we have infinite possible outcomes. We can easily measure out the volume of water added and the pounds of malt and hops. Many brewers pitch a consistent volume or weight of yeast slurry as well. The only problem with this is that it’s not necessarily a consistent number of viable yeast cells.
Yes, we can see yeast slurry, but we can’t see the individual yeast cells that the slurry is made up of and which ferment our beer. One of my favorite sayings is “brewers make wort, yeast make beer,” and yet the importance and care of yeast are often taken for granted.
When you don’t add enough yeast to your wort, or underpitch your beer, yeast gets stressed and overworked. This can lead to off flavors and inconsistent fermentations. Adding too much yeast can also lead to off flavors and affect your fermentation rates.
Consistent fermentations help you schedule upcoming beers, ensure you have healthy yeast available to collect and re-use and provide a more predictable flavor profile.
In many breweries, the lab is responsible for counting yeast cells and communicating the amount of yeast needed to pitch each batch of beer. Other breweries you’ll find this falls on the brewers or cellar workers. It’s great to have a variety of people who are trained on it since people like to take a vacation every now and then.
You also need to take into consideration schedules. If you brew two or three shifts but the lab is only there first shift, you might run into some issues. Find what works best for your brewery.
When I first started the lab at Zero Gravity I was performing all the cell counts. As Zymology Labs continues to grow, some of my original tasks have been transferred. There are now five rotating shift brewers trained on cell counting and viability testing.
When they harvest yeast into a brink (or two or three), they also collect a sample of yeast to bring into the lab and count. Typically they’re collecting yeast the morning or day before it’s needed and will store it in the cooler until use.
For those of you who don’t yet have a lab at your brewery, cell counting is a great place to start!
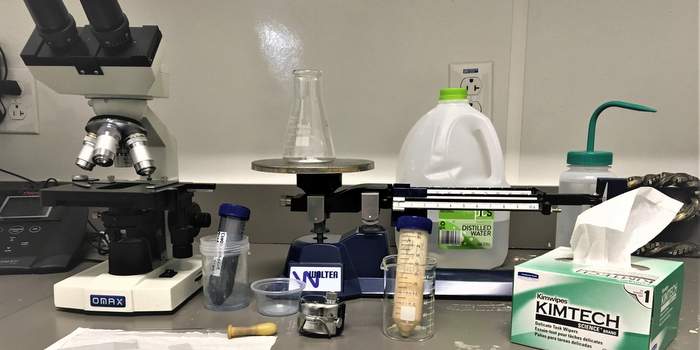
While it’s definitely handy, lab experience is not necessary for cell counting. What is necessary:
- Microscope — up to 400x
- Hemocytometer
- Scale or 100mL volumetric flask
- Pipet — I like pasteur for loading hemocytometer
- Counter
- Methylene blue dye
- Distilled water
- Wash bottle
Optional but useful:
- 100mL Erlenmeyer flask (if pitching by weight)
- Parafilm
- Spatula — for sampling yeast
- Centrifuge tubes 50mL or 15mL is doing serial dilutions
First step is to obtain your yeast sample
Now there are quite a few ways/times/places to do this. I briefly mentioned where we collect at Zero Gravity above. The key is to get a sample that is as homogeneous as possible, that represents what you will be pitching. You don’t want the trub and yeast cells that die off first and collect on the bottom. You also don’t want the late flocculating yeast on the top of the pile. What you want is that sweet spot right in the middle.
Since this is an article about cell counting I’ll refer you to Nate Ferguson’s article on yeast repitching that goes into more detail on yeast cropping methods and storage.
When you’re first starting out, if you collect into multiple vessels you might want to take samples from each to compare. Get a sense of how consistent the counts are between vessels. You might need to do one count for each brink, or you might be able to do one count for multiple brinks. As you collect and count you’ll find the ideal time to grab a sample for counting.
I’m going to start by giving a detailed explanation of each step and then a quick reference guide and link to a video at the end.
Make a 1:100 dilution of your yeast slurry
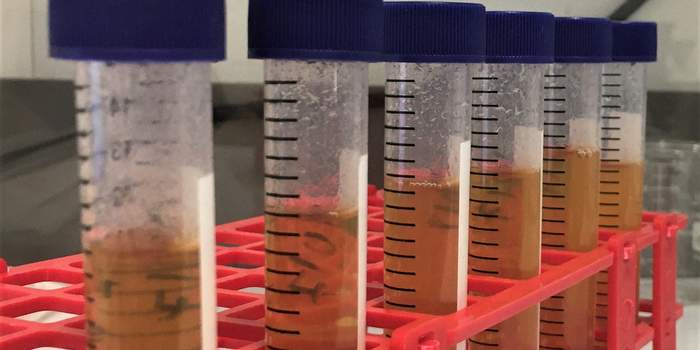
This will give you a manageable number of cells to count on your hemocytometer. There are a few different ways to make a 1:100 dilution. Some people will do serial dilutions, mixing 1mL of slurry with 9mL of water and making a 1:10 dilution. You then mix your 1:10 dilution and take 1mL out of there into another 9mL of water leaving you with a 1:100 dilution of your yeast slurry.
You can add 1mL of yeast into a 100mL volumetric flask, which has a marking at exactly 100mL. The markings on beakers, Erlenmeyer flasks and test tubes are only approximate, but a volumetric flask is used for an exact volume.
*The best way I’ve found to measure 1mL is with an Autopipette and tip set at 1000uL. Transfer pipets with 1-3mL marking are not very accurate, and it’s hard to only pull up 1mL when using a serological pipet and bulb. You’ll end up with yeast stuck to the sides and can have a hard time making sure you only have one mL.
Since we weigh out our yeast and pitch by the pound, I add one gram of yeast slurry into a clean, dry, Erlenmeyer flask and add 99g of water.
Now, I’m sure you have some scales lying around the brewery, but they might not be accurate enough
You want a scale that can measure in grams and can go down to one to two decimal places. If you find you’re adding a drop or two of yeast but the scale isn’t moving, it’s not sensitive enough. There can be a lot of yeast cells in that little drop of yeast! You also need the scale to be able to hold your 100mL Erlenmeyer flask and 99g of water.
When I first learned how to perform cell counts and viability tests at Magic Hat, we used a triple beam balance. It brought be back to high school, and I actually enjoy using triple beam balances. It takes some getting used to, but once you have the hang of it, it’s fun.
Scales can get pretty expensive when you’re looking for one sensitive enough to handle yeast, so the great thing about using a triple beam balance is they’re very affordable and you can get one under $100. You’re weighing out (pun intended) the pros and cons of time, cost and sensitivity when choosing a scale.
Cover your Erlenmeyer (or volumetric) flask with Parafilm and vigorously shake it. Parafilm is a stretchable film made out of waxes and polyolefins and is very handy to have in the lab. Take out your hemocytometer and center the coverslip on top. I put mine on a white Kimwipe for contrast.
You want a Neubauer-improved hemocytometer which has a depth of 0.1mm and a counting grid consisting of 25 groups of 16 small squares. More on this once we start counting. Try to find one with a “V” etched into both sides for easier loading. Standard line versions are typically cheaper but bright line versions offer greater contrast with bright lines against a dark background. Expect to pay $80-150 for a good one, you get what you pay for with accuracy.
Use a coverslip designed for a hemocytometer, they are made out of a high quality optical glass and have a different weight and size than regular coverslips which helps avoid overfilling the counting chamber which can lead to inaccurate results.

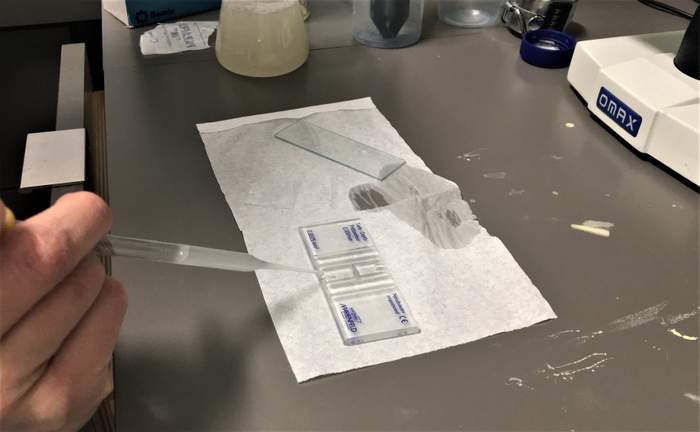
I use a Pasteur pipet and bulb to load my hemocytometer. Pasteur pipets are long thin pipets and I find it much easier to get a tiny droplet of diluted yeast slurry with one of these than with a transfer pipet, which has a wider opening.
Always shake your diluted yeast slurry right before use as the yeast can quickly settle out to the bottom and you want a homogenous sample
Pull up a sample of your diluted yeast slurry by squeezing and releasing the pipet bulb attached to your Pasteur pipet. Dispel a few drops as yeast may settle in the tip. Hold a droplet on the tip of your pipet and gently touch it to the “V” on your hemocytometer. Capillary action will send your droplet right where you want it.
Repeat on the other side. If you notice that your diluted yeast slurry is only half covering the counting chamber, or has overflowed into the side, clean off the hemocytometer and do it again. This step takes practice but once you get used to it, it’s easy. It’s also one of those steps that never works when you’re in a rush. You’re going to use the volume of this counting chamber when calculating how many yeast cells you have per mL or gram of yeast so it’s important not to over or under fill it.
Put your slide on the microscope and start on the 4x lense
Find your cells using the focus knobs then do the same at the 10x and 40x lenses. There’s a grid of 25 squares that are made up of 16 smaller squares. You will count the cells in five of these 25 squares (surrounded by triple lines). Count the four corners and center square to get the most accurate representation.
Count only the cells that are touching the top and right lines. Do not count any cells touching the left and bottom lines.
*alternatively you can count bottom and left but not top and right, just be consistent.
When there are triple lines, the middle line is your border. If cells are touching the middle top and right lines, but are outside of the square, still count these. If there are cells touching the bottom and left middle lines but are inside the square, DO NOT count these. This makes it so you don’t count cells more than once. Follow this pattern for both the five groups of squares and the individual 16 squares in each of those five squares.
Work your way through each square going in a zig zag pattern.
If you see a budding cell, you may count it as two if the daughter cell is more than half the size of the mother cell, otherwise count as one.
If your total count for the 25 squares is less than 200 cells you will need to count all 25 squares and not just the four corners and center square. The number of cells in each of the five groups of 16 squares should be relatively close in number. If you have one that’s 25, and the rest are between 85-100, either clean off your slide and do another count or see if there’s another square more representative of the whole. You don’t have to stick to the four corners and one center as sometimes you find clumps of cells that would skew your count.
Count both grids on each side of the hemocytometer
Your counts should be within 10% of each other. If they are not, clean and dry the hemocytometer using distilled water and Kim Wipes, shake your yeast slurry dilution and add another drop to each side of the slide. Count your cells again and see if they are any closer.
I use a cell counting app on my phone, you can also use a hand held counter or just write down the value of each square on a piece of paper as you go to keep track of the number of cells.
If you find too many clumps of yeast when trying to count you can add a drop of sulfuric acid to your yeast slurry dilution and this will break it up. If you have a chemical titration kit to make sure you’re using the right amount of chemicals during cleaning (which you should) you can probably find some in there. Keep in mind this will affect your viability test.
Many people will add a methylene blue stain before performing this step and do a viability count at the same time as their cell count. That’s too much for me, I like to do one step at a time. I also don’t want everything to turn slightly blue from the dye.
After I make my 1:100 dilution, before adding any sulfuric acid to de-clump yeast, I pull up 1mL of my dilution and put in in a little plastic cup. After I do my count, I come back to my sample and add another 1mL of 0.1% methylene blue. You can buy this as a powder or in liquid form and dilute down.
Let the mixture sit for two minutes then put a drop on a regular microscope slide and cover it with a cover slip
Put it under the microscope and count both live and dead cells. I count a total of at least 200 cells and keep track of the dead ones. Dead cells will stain a dark blue. Live cells are able to metabolize the stain whereas dead ones can’t. Keep in mind budding cells may also stain dark blue but should not be counted as dead, they just have too much going on to metabolize the dye.
To get your viability, subtract the number of dead cells from the total number of cell and divide by the total number of cells.


Scott Stokes says
Ryan Blondell